
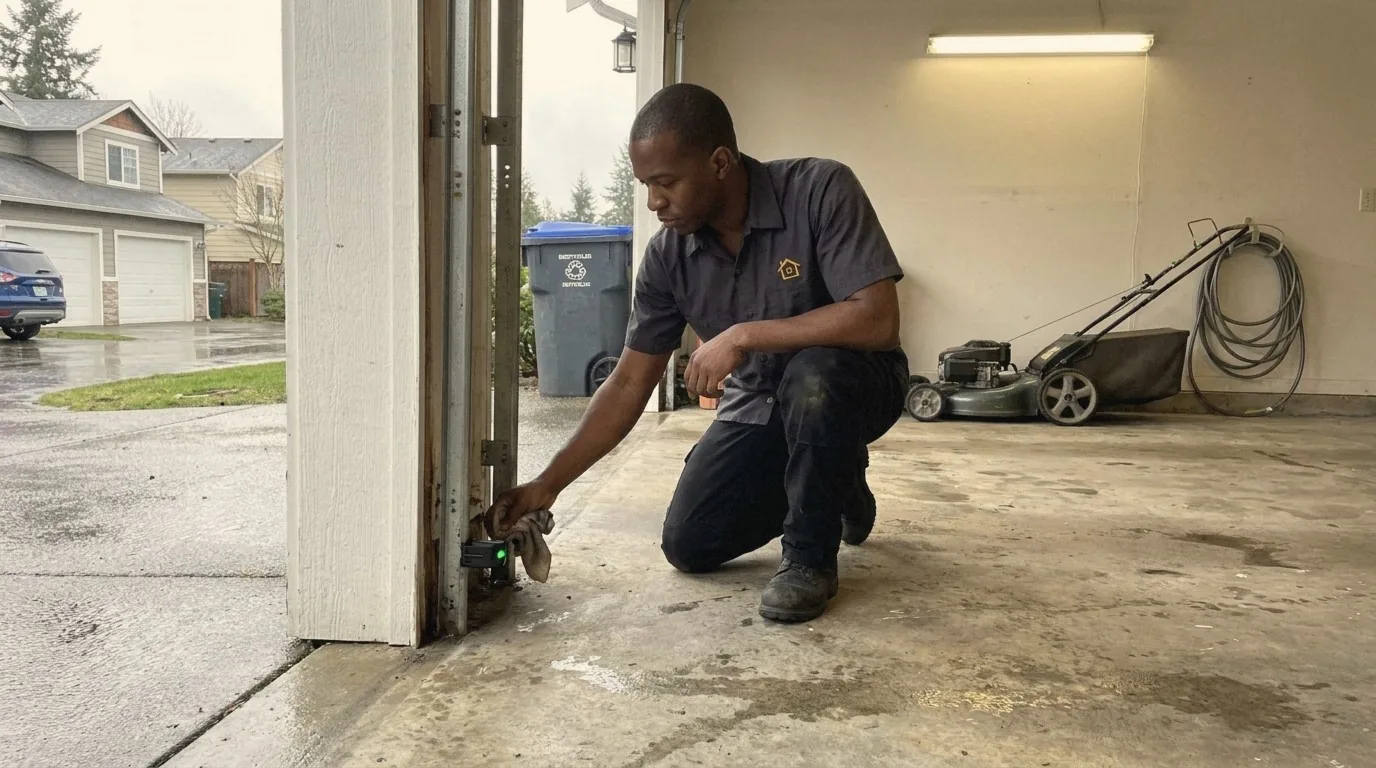
A garage door reverses before closing for one of two reasons: the safety sensors near the floor lost their beam, or the opener’s force and travel limits decided the door hit something. The quick way to tell which system reversed the door is to watch where it happens. If the door turns around before it touches anything and the opener light flashes (or, on units made after early 2022, a sensor LED is dark or flickering), it is the sensors; if it reaches the floor or stops just above it and comes back up with no flashing, it is the down limit or the close force; if it reverses at the same spot partway down, something in the track, a roller or the door itself is binding. Perfection Garage Door in Renton works through all three in the order below.
Last reviewed October 2026 against the manufacturer support pages and federal rule listed at the end.
Which system reversed the door: the three tells
| What you see | Which system | Where to start |
|---|---|---|
| Door starts down, reverses right away; opener light flashes 10 times on pre-2022 LiftMaster and Chamberlain units, or a sensor LED is off or flickering | Safety sensors (photo eyes) | Sensor LEDs, lenses, sunlight, wiring (steps 1 to 4) |
| Door reaches the floor or stops an inch above it, then goes back up, no flashing | Down travel limit set past the floor, or close force too low for the door | Balance test first, then limits and force (steps 7 to 9) |
| Door reverses at the same height every time, often with a shudder | Obstruction, bent or worn roller, binding section | Tracks, rollers, hinges (steps 5 and 6) |
| Door reverses only on wet days or only in the afternoon | Sensors: condensation on the lenses, or low sun into the receiving eye | Steps 2 and 3 |
Both systems are required by federal law. Federal rule 16 CFR 1211 requires every residential opener manufactured on or after January 1, 1993 to reverse within 2 seconds of contacting an obstruction and to carry a secondary entrapment device, normally the photoelectric eyes (DASMA Technical Data Sheet 351). A door that reverses is a door whose safety systems are working; the job is to find out what they are reacting to, not to defeat them.
Diagnostic steps, in order
Perfection Garage Door checks a reversing garage door in this order: sensor LEDs, lens cleaning, sunlight across the beam, sensor wiring, debris in the tracks, rollers and hinges, door balance by hand, spring tension, and only then the travel limit and force settings, finishing with the 2×4 reversal test. The order matters because a limit or force change on an unbalanced door hides the real fault.
1. Read the sensor LEDs
Every garage door opener has two sensors mounted on the tracks no higher than 6 inches above the floor, and each has a small LED that tells you whether the beam is landing. On LiftMaster and Chamberlain openers the sending eye glows amber and the receiving eye glows green; a green LED that is off, dim or flickering means the receiving eye is not seeing the beam. On Genie openers the source sensor has a red LED and the receiver a green one; a blinking red LED means the source is misaligned, and a green LED that blinks twice and pauses means the beam is obstructed or misaligned. Steady lights on both sensors and a door that still reverses means the fault is not the sensors: it is in the tracks, the rollers, the door balance or the opener’s limits.
2. Clean the lenses: rain and condensation in western Washington
In a Renton garage, the sensor lenses get fogged more often than they get knocked. NOAA’s 1991 to 2020 normals for Seattle-Tacoma Airport show 156 days a year with measurable rain, with November, December and January averaging 18 to 19 wet days each. On those days cold damp air rolls in under the door and the lenses, sitting in the wettest 6 inches of the garage, collect condensation that scatters the beam. Wipe both lenses with a dry microfiber cloth, clear anything within a foot of each sensor, and watch the LEDs settle. A door that only reverses on wet mornings and behaves by afternoon usually points to this problem, and a dry cloth beside the door in October is the fix.
3. Sunlight across the beam
Low winter sun can blind the receiving eye. Chamberlain names sunlight into the green receiving sensor as a cause of false sensor faults, and Genie’s green LED has a four-blink code specifically for interference. At Renton’s latitude the sun at solar noon on the shortest day stands only about 19 degrees above the horizon and sets in the southwest, so a south- or southwest-facing garage opening in Kent’s East Hill, the Renton Highlands or Maple Valley can take direct sun across the beam for an hour or two in the afternoon from November to February. Watch whether the reversal follows the sun. If it does, swap the sensors so the receiving eye sits on the shaded side, fit a sun shield or a hooded sensor (Genie’s Version 2 sensor comes with a lens cover), or shade the receiver with a short length of pipe.
4. Wiring, especially in detached garages
Detached garages in Renton, Kent and Maple Valley give Perfection Garage Door more sensor-wiring faults than attached ones, for a simple reason: the low-voltage wire from the opener to the sensors runs farther, along framing that gets wet, and it was often stapled by whoever hung the opener. Follow both wires from the sensors to the powerhead and look for a staple through the insulation, a splice gone green, or a loose terminal. On LiftMaster and Chamberlain openers the white wires go to the white terminal and the white-and-black wires to the black (grey) terminal; a reversed pair gives diagnostic code 1-2 and a door that moves an inch and comes back. Genie wiring is non-polar, so a swapped pair is not a fault there. Both sensor LEDs dark means no power is reaching them at all: check the terminals, then the wire run.
5. Moss, fir needles and debris in the tracks
A door that reverses at the same height every trip is usually hitting something, and in south King County that something is often organic. Douglas fir needles blow in under the door every fall, get wet and pack into a wedge in the lower track and the curve; moss grows on the bottom section and the track lip on shaded north walls; grit from a gravel drive collects where the roller enters the vertical track. A roller hitting the wedge jolts the door, and the opener reads the jolt as an obstruction and reverses. With the opener unplugged and the door open, brush and vacuum both tracks from the floor to the curve. Keep the tracks clean and dry rather than greased, since grease holds the next season’s needles and grit; lubricate the rollers, hinges and springs with a garage door spray instead.
6. Bent or worn rollers and hinges
Chamberlain’s diagnostic code 4-1 (door reverses, stops or struggles while closing) and 4-3 (door reverses just before the floor) both send you to the rollers and hinges before anything else. Spin each roller by hand with the door closed: wobble, grinding or a flat spot means the roller drags in the curve, and the drag trips the force limit. Look along each track for a dent or a section pulled off the wall. Roller and bottom-bracket work involves parts under spring tension, so replacing rollers is a technician job; cleaning and lubricating them is not.
7. Test the door balance before touching limits or force
With the door fully closed, pull the red emergency release cord, lift the door by hand to waist height and let go. A balanced door stays where you leave it and lifts with one hand. A door that drops, climbs or feels heavy has a spring problem, and no limit or force setting should be changed until it is fixed. Never pull the release cord while the door is open. Close the door, run the opener until the trolley clicks back onto the carriage, and then look at the springs.
8. Springs that changed tension
Torsion springs lose tension gradually and rust faster in a damp garage, so a door that balanced two winters ago can be heavy enough today to trip the opener’s close force on the way down, or heavy enough that the opener struggles to lift it and the door drifts back down after opening (Chamberlain code 1-6). Raising the force to push a heavy door closed hides the symptom and defeats the reversal protection, which is why Chamberlain’s own instructions say never to use force adjustments to compensate for a binding or sticking door. A door that fails the balance test needs garage door spring repair, and a reversal problem that appeared at the same time as a louder, slower door often means a spring changed rather than an opener failing.
9. Adjust the down travel limit and the close force
Adjust the limits and force only on a garage door that passed the hand balance test and has clean tracks. A down limit set past the floor makes the opener drive the door into the slab, read the resistance as an obstruction and reverse; a close force set too low makes a slightly stiff door reverse before it gets there. Make one change at a time and run a full cycle after each.
- LiftMaster and Chamberlain with an Adjustment button and UP and DOWN arrows (Security+ 2.0 and myQ units): hold the Adjustment button until the UP arrow flashes, hold UP to the open position you want, press Adjustment, hold DOWN to the closed position, press Adjustment, then press UP once and DOWN once so the opener runs a full cycle. Force is learned automatically after travel is set, so there is no force dial to turn. Five flashes during programming means it timed out; start again. Ten flashes means the sensors interrupted it.
- LiftMaster and Chamberlain with black and purple (or black and yellow) buttons: hold the black button until the LED flashes slowly and keep holding until the door reaches the open position, then press the remote to save. Hold the purple or yellow button until the door reaches the closed position and press the remote to save. For force, press the purple or yellow button twice, then run the door closed, open and closed with the remote until the LED stops flashing.
- Older LiftMaster and Chamberlain with screws on the motor housing: one turn of a limit screw moves the stop about 2 inches. Turn the DOWN limit screw clockwise to shorten the down travel if the door hits the floor and reverses. Running the door repeatedly during adjustment can overheat the motor; if it stops, let it cool before continuing.
- Genie (2011 and newer, with SET/PRGM, UP and DOWN buttons): hold DOWN until the long LED lights blue, release, hold DOWN until the door is fully closed with the weatherstrip sealed but not buckled, then press SET/PRGM. Genie’s own check order for a reversing door starts with obstructions and the red Safe-T-Beam LED, and Genie notes that a down limit set too far makes the opener read the floor as an obstruction and reopen right after closing. Older Genie Excelerator units use mechanical limit switches and force dials; a status LED blinking 4 times on those means the force settings are wrong.
After any adjustment, lay a 2×4 flat on the floor under the center of the door and close it. The door must reverse when it touches the board (1-1/2 inches high). Chamberlain and LiftMaster say to repeat this test monthly. A door that pushes on the board or stalls instead of reversing should not be used until the opener is serviced.
What the opener light blinks mean
| Opener | Signal | Meaning |
|---|---|---|
| LiftMaster, Chamberlain (made before 2022) | Main light flashes 10 times | Safety sensors obstructed, misaligned or disconnected |
| LiftMaster, Chamberlain (any age) | Main light flashes 2 times | LOCK is on at the wall control; remotes are ignored, the door is not reversing |
| LiftMaster, Chamberlain with UP and DOWN arrows | Code 1-1 (1 UP flash, 1 DOWN flash) | Door closes then reverses: sensor beam blocked or misaligned |
| Same | Code 1-2 | Door moves an inch or two and returns: sensor wires reversed or shorted |
| Same | Code 4-1 | Door reverses or struggles anywhere while closing: obstruction, rollers, or travel set past the floor |
| Same | Code 4-3 | Door reverses just before the floor: path, rollers, or the travel module |
| Same | Code 4-5 | Door closes and returns open after a part replacement: wrong travel module |
| LiftMaster, Chamberlain without arrows | LED by the LEARN button: 1, 2 or 4 flashes | 1 = sensor wire broken; 2 = sensor wires shorted or reversed; 4 = sensors slightly misaligned |
| Same | LED by the LEARN button: 5 flashes | Door did not move in the first second: mechanical stoppage, check balance and springs |
| Genie Safe-T-Beam | Red LED blinking | Source sensor misaligned |
| Genie Safe-T-Beam | Green LED blinks 2, pause | Beam obstructed or misaligned |
| Genie Safe-T-Beam | Green LED blinks 4, pause | Interference, usually sunlight into the receiver |
| Genie Excelerator powerhead | Status LED blinks 4 or 5 | 4 = force settings incorrect; 5 = Safe-T-Beam fault |
Two notes on newer units. LiftMaster and Chamberlain openers and logic boards made after early 2022 no longer flash the main light 10 times for a sensor fault, so read the LEDs on the sensors themselves; the same units no longer let you close the door by holding the wall control push bar. For full code lists by brand, see the LiftMaster garage door opener troubleshooting guide and the Genie garage door opener troubleshooting guide.
When to call a pro
Stop troubleshooting and call for garage door opener repair when the door fails the balance test, when the sensors will not hold a steady LED at any angle, when the same reversal returns within days of a limit or force reset, or when the 2×4 test fails. Each of those means the cause is in the door hardware or the opener’s travel module, logic board or RPM sensor, not in a setting you can reach. Call immediately, without running the opener again, if you see a gap in a spring coil, a frayed or slack cable, a door hanging crooked, or a roller outside the track.
Perfection Garage Door diagnoses reversing doors across Renton, Kent, Maple Valley, Tukwila, Newcastle, Bellevue, Issaquah and Sammamish, with a written quote before any work starts and a fast response on calls where the door is stuck open. The truck carries sensor pairs for LiftMaster, Chamberlain and Genie, nylon rollers, and travel modules and logic boards for the common units, so a sensor, roller or module repair can usually be handled on the same visit. For a door that stops short with a gap at the floor rather than reversing, the garage door won’t close all the way guide covers swollen seals, slab settlement and limits set short.
Garage door reverses before closing: FAQs
Why does my garage door go back up when closing but nothing is in the way?
A garage door that goes back up with nothing visible in the way is reacting to one of four things: condensation, dirt or sunlight on a sensor lens; a sensor knocked a few degrees out of line; a down travel limit set past the floor so the slab reads as an obstruction; or a door that has become too heavy or stiff for the close force because a spring weakened, a roller wore flat or the track is packed with debris. Check the sensor LEDs first, then the door balance by hand, then the limits.
Why does my garage door only reverse when it rains?
Rain reverses a garage door through the sensors, not the motor. Cold wet air under the door condenses on the lenses, which sit within 6 inches of the floor, and the fogged lens scatters the beam enough to trip a sensor fault. In Renton the worst stretch is November through January, when Seattle-Tacoma averages 18 to 19 wet days a month. Wipe both lenses dry, confirm the LEDs are steady, and keep the floor inside the opening clear of wet bins and dripping bikes. If the door also reverses on dry days, look at the tracks and balance instead.
Can I just hold the wall button to close a door that keeps reversing?
On Genie openers and on older LiftMaster and Chamberlain openers, holding the wall control push bar until the door is fully down will close it once past a sensor fault, because the opener treats a held button as a deliberate command. LiftMaster and Chamberlain openers and logic boards made after early 2022 no longer allow it. Either way it is a one-time way to secure the garage, not a fix: the door is closing with no entrapment protection, and the sensors still need to be realigned or repaired.
Is it safe to turn up the force so the door stops reversing?
No. Raising the close force to stop a reversal defeats the protection that federal rule 16 CFR 1211 requires, and Chamberlain’s instructions say never to use force adjustments to compensate for a binding or sticking door. A door that needs more force than it did last year has a mechanical problem: a weak spring, dragging rollers, a bent track or debris. Fix that cause, then confirm the door still reverses on a 2×4 laid flat on the floor.
About Perfection Garage Door
Perfection Garage Door is a locally owned garage door repair and installation company based in Renton, WA 98057, serving Renton, Kent, Bellevue, Issaquah, Sammamish, Tukwila and Newcastle since 2010. The team repairs springs, cables, rollers, panels and openers, installs new insulated steel, carriage house, glass and wood doors, and offers same-day service across south King County. Every job starts with a written quote. Call or text Perfection Garage Door at (425) 264-8378, 24 hours a day.
Sources: DASMA Technical Data Sheet 351 (16 CFR 1211 requirements); Chamberlain Group support articles on flashing opener lights, diagnostic codes, LEARN-button LED codes, and travel and force programming for Security+ 2.0, black and purple button, and manual screw openers; Genie support pages on a reversing door, the Safe-T-Beam self-diagnostic chart, travel limit programming and the Excelerator status LED; NOAA 1991 to 2020 climate normals for Seattle-Tacoma Airport; NOAA Solar Calculator for sun elevation at Renton. Checked October 2026.